
DIY basement finishing transforms unused space into valuable living areas while building practical construction skills. Homeowners can complete many basement renovation tasks independently, from framing basement walls to hanging drywall, potentially saving significant money compared to full contractor pricing. However, success requires careful planning, understanding building codes, and knowing when professional expertise becomes necessary for safety and quality.
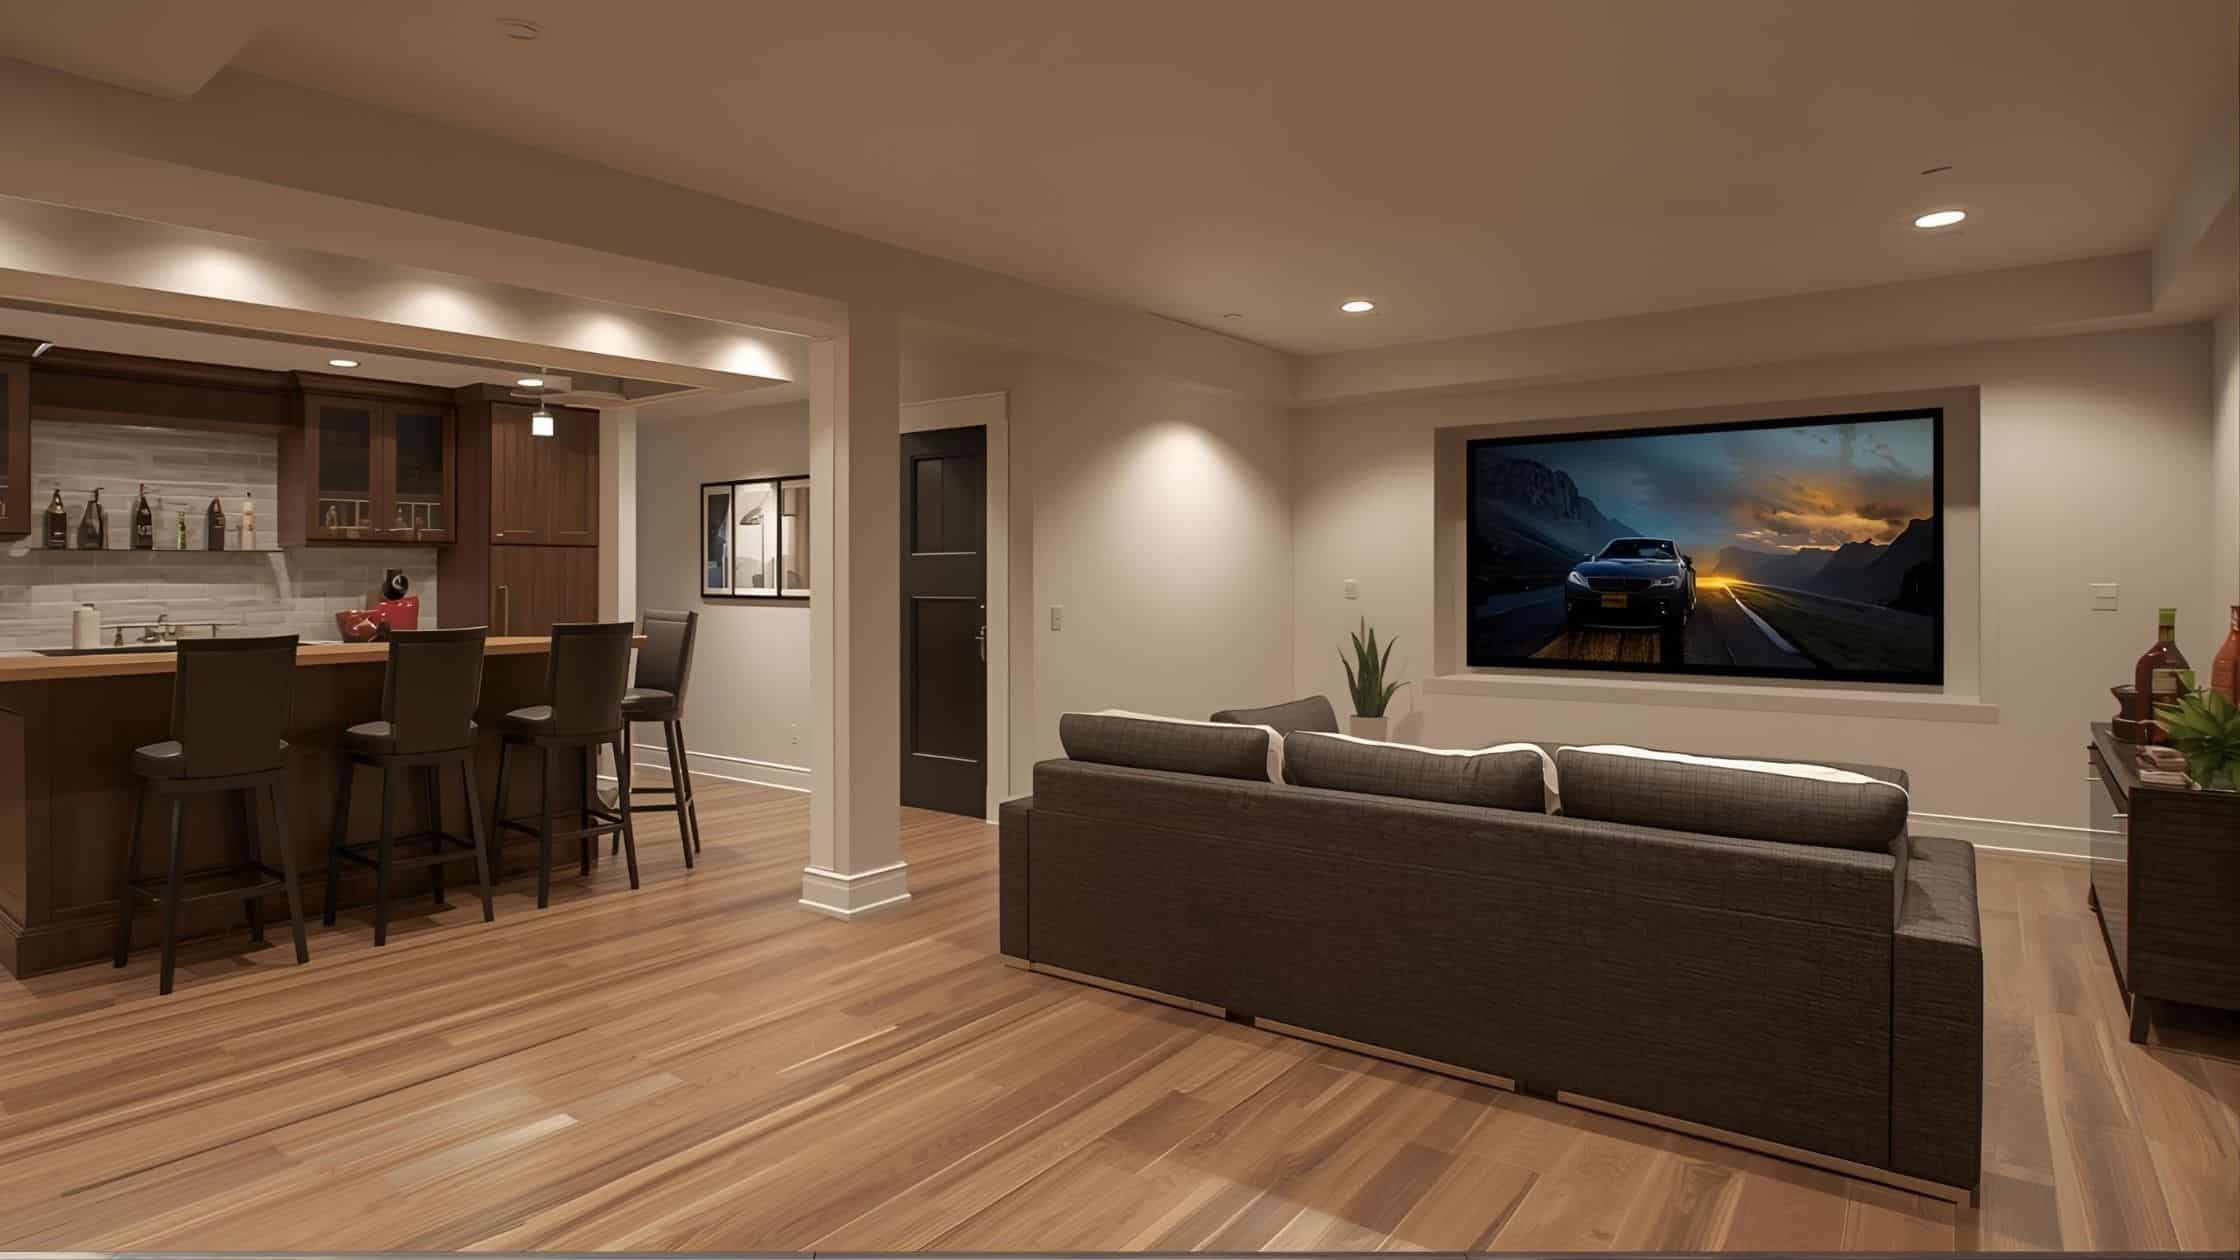
Converting an unfinished basement into functional living space ranks among the most rewarding home improvement projects. The additional square footage increases home value while providing extra bedroom space, bonus room possibilities, utility room expansion, or entertainment areas. Frederick, Maryland homeowners discover that finishing basement spaces creates practical solutions for growing families and changing needs.
Many homeowners hesitate to finish a basement because the whole project seems overwhelming. Breaking the major project into manageable phases makes the difficult task achievable over several months. Understanding each step, from initial planning through final touches, builds confidence and prevents costly mistakes that plague unprepared DIYers.
This step by step guide covers everything needed to finish a basement successfully. From addressing moisture problems to installing recessed lights, readers will learn essential techniques and discover when to tackle tasks independently versus hiring licensed professionals. The information applies whether planning a complete transformation or a modest utility room upgrade.
Why Plan Your DIY Basement Finishing Project First

Planning separates successful basement renovation projects from frustrating failures. Thoughtful preparation addresses structural work requirements, establishes realistic budgets, and identifies potential problems before cutting the first board.
Creating Your Basement Floor Plan
A detailed floor plan guides every subsequent decision throughout the basement finishing process. Measure the entire room dimensions, noting ceiling height, obstructions like support posts, and locations of existing utilities. Mark the positions of the sump pump, electrical panel, water heater, and HVAC equipment that must remain accessible.
Consider how the new space will function before finalizing the layout. Extra bedroom additions require egress windows for safety and code compliance. Entertainment areas benefit from open floor plans while home offices need privacy and quiet. Storage area needs influence how much space remains unfinished for utilities and seasonal items.
A scale drawing helps visualize furniture placement and traffic flow. Graph paper works well for hand-drawn plans, or free online tools create professional-looking layouts. This planning step prevents expensive framing mistakes that become apparent only after basement walls stand completed.
Essential elements to include in your floor plan:
- All permanent fixtures (furnace, water heater, electrical panel, sump pump)
- Support posts and structural columns that cannot be moved
- Existing and planned door openings with swing directions
- Window locations including required egress windows for bedrooms
- Electrical outlet and switch locations throughout each room
- Plumbing locations for bathrooms or wet bars
- HVAC vent and return air locations
- Adequate clearance around utility equipment for service access
Did you know? Most building codes require finished basement bedrooms to have at least 70 square feet of floor space and a minimum ceiling height of 7 feet, though Maryland and many jurisdictions require 7.5 feet in habitable rooms.
Understanding Building Codes and Permits
Building codes exist to ensure safety, structural integrity, and proper construction methods. Finishing a basement without required permits creates legal problems, complicates home sales, and may require removing unpermitted work. Contact Frederick’s building department early to understand specific requirements.
Most jurisdictions require permits for electrical work, plumbing modifications, and structural changes. Framing new basement walls, adding egress windows, or creating bedrooms trigger inspection requirements. The building inspector visits at specific project phases to verify code compliance before work continues.
Egress windows become mandatory when creating sleeping rooms below grade. These openings must meet minimum size requirements and allow occupants to escape during emergencies. According to the International Residential Code, bedroom egress windows need minimum opening dimensions of 20 inches wide by 24 inches high, with the bottom of the opening no more than 44 inches above the floor.
Plan ahead by scheduling inspections at appropriate times. Typical inspection points include framing completion, electrical rough-in, plumbing rough-in, insulation installation, and final completion. Missing inspection windows can delay projects significantly.
Setting a Realistic Budget and Timeline
Accurate cost breakdown planning prevents mid-project funding shortfalls that stall progress. Price major materials like framing lumber, drywall sheets, insulation, and flooring before starting work. Include electrical supplies, plumbing fixtures if applicable, ceiling materials, paint, and trim. Account for tool rentals or purchases needed for specialized tasks.
Labor costs vary tremendously based on which tasks homeowners complete versus hiring contractors. Electrical work and plumbing typically require licensed professionals. Structural work involving support beams or foundation walls needs engineering approval. DIY tasks like framing, insulation, and painting reduce overall expenses substantially.
Timeline estimates must account for permit processing, inspection scheduling, material delivery delays, and learning curves on unfamiliar tasks. Most DIY basement finishing projects span 3-6 months working evenings and weekends. Rushing through steps compromises quality and creates problems requiring expensive fixes.
How Do You Prepare the Basement Floor and Walls?
Preparation work determines whether the finished basement remains dry, comfortable, and code-compliant for decades. Addressing moisture problems and ensuring proper environmental conditions must occur before installing any finishing materials.
Solving Moisture Problems First
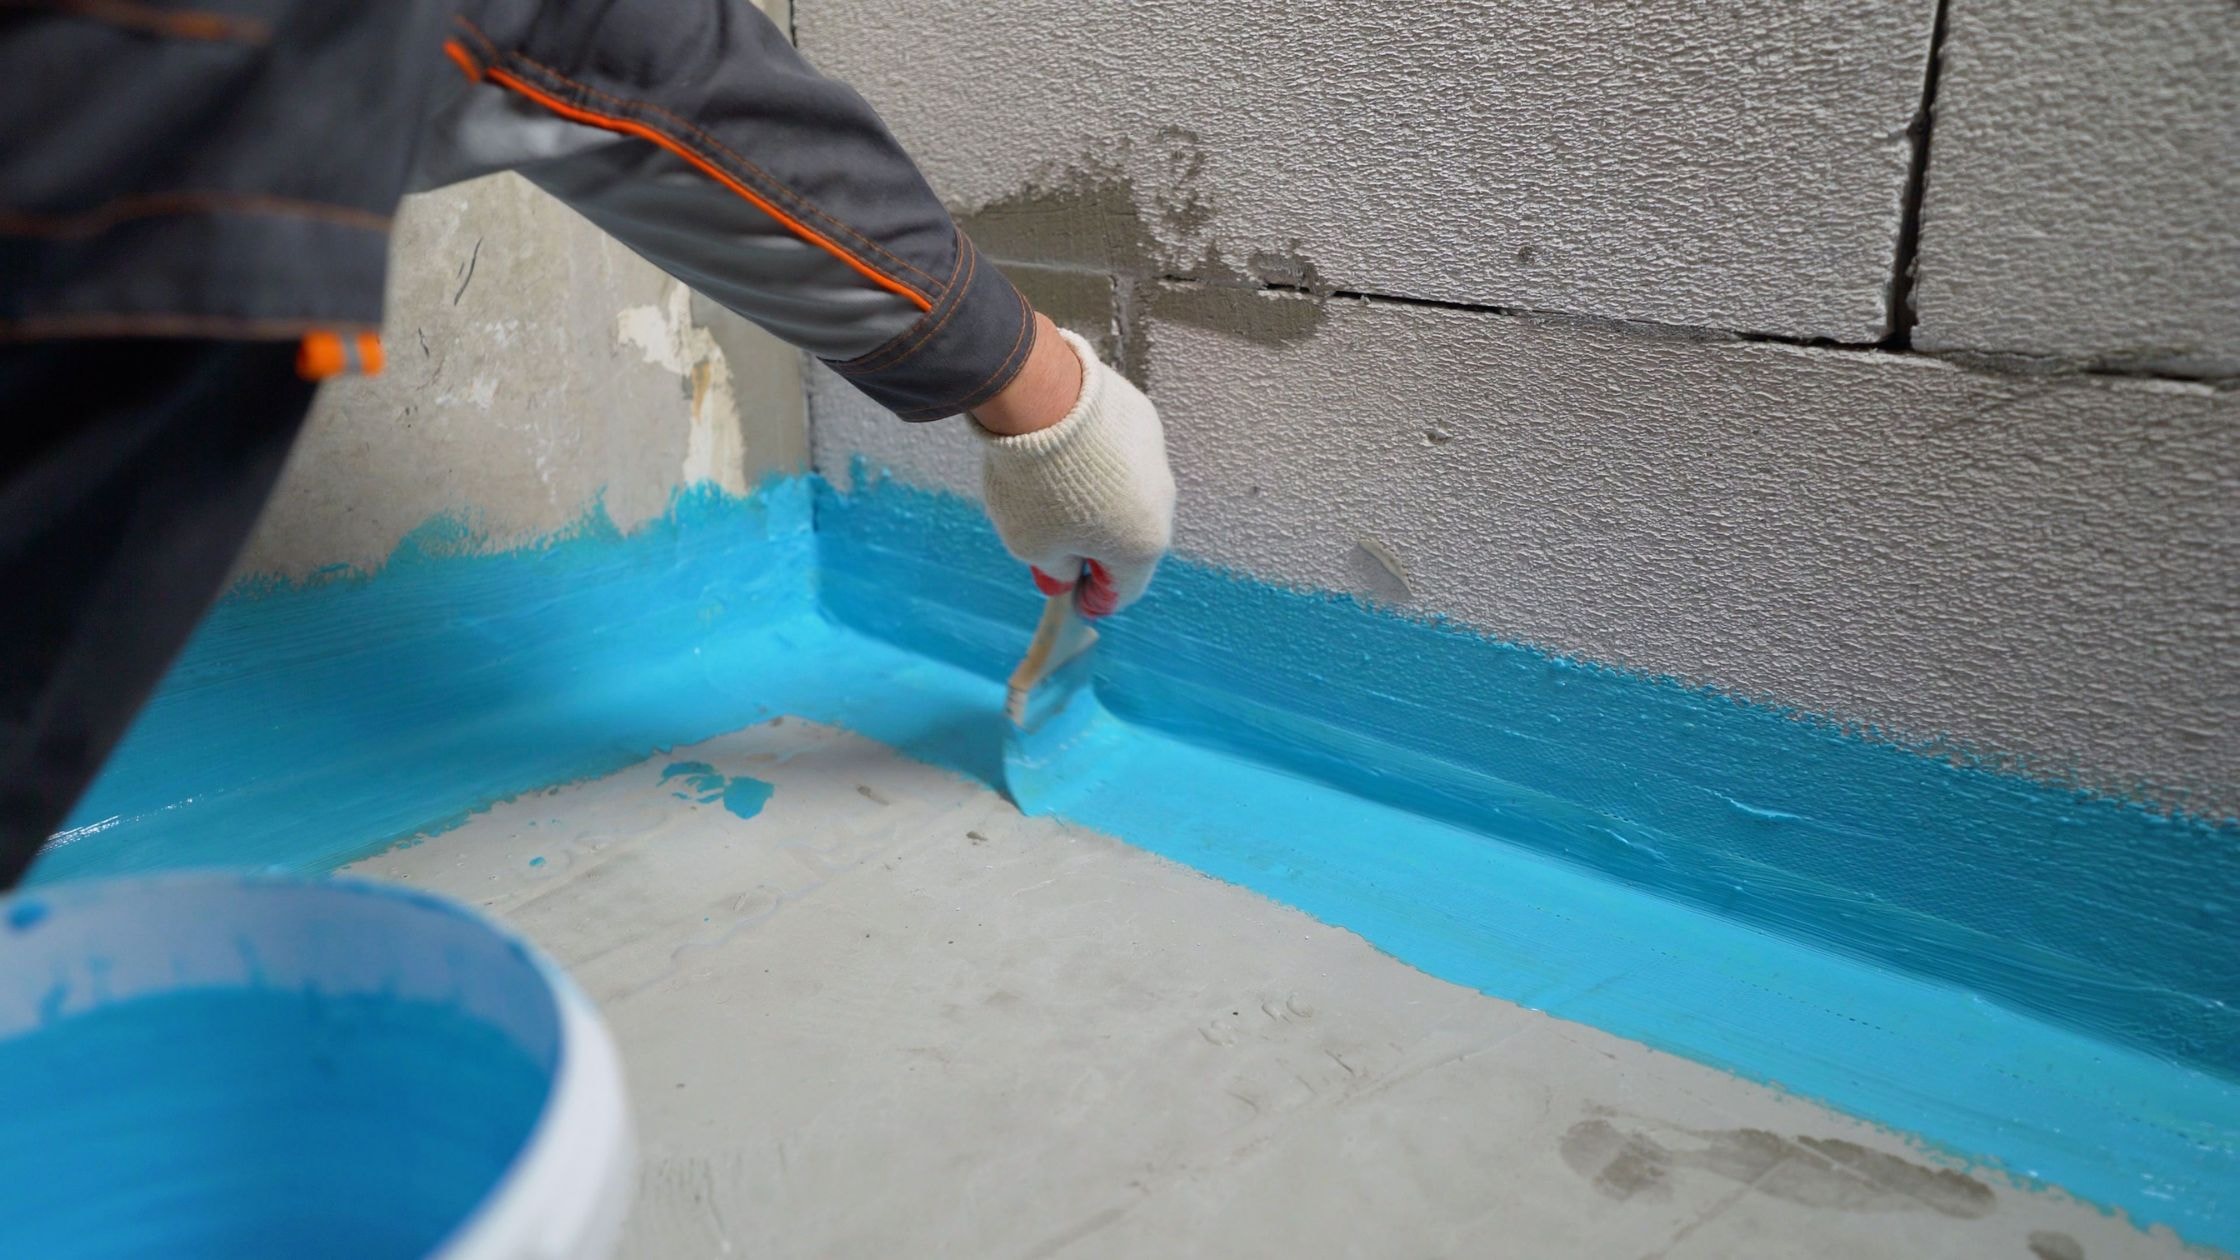
A damp basement requires waterproofing before finishing work begins. Water intrusion destroys drywall, promotes mold growth, and ruins flooring investments. Proper basement waterproofing addresses water sources and creates the dry environment essential for finished spaces.
Check concrete walls and the basement floor for signs of water infiltration. White powdery deposits called efflorescence indicate water moving through concrete. Persistent dampness, musty odors, or visible mold signal problems requiring resolution before proceeding. Test basement moisture by taping plastic sheets to concrete walls and floors for 24 hours, then checking for condensation underneath.
Foundation walls showing active water seepage need exterior waterproofing or interior drainage systems. Install or verify proper sump pump operation. Ensure exterior grading slopes away from the house and gutters discharge water far from the foundation. These steps create the dry conditions finishing materials require.
Cleaning and Repairing the Concrete Floor
Clean the concrete floor thoroughly to remove dust, dirt, oil stains, and loose concrete. A clean surface ensures proper adhesion for any floor treatments or coverings. Sweep the entire length, then vacuum to capture fine particles. Consider renting a power washer for heavily soiled floors.
Fill cracks and depressions in the concrete floor with hydraulic cement or concrete patching compound. Level significant low spots to prevent water accumulation under future flooring. Small imperfections matter less with floating floor systems but become visible under sheet vinyl or tile.
Consider moisture barriers for the basement floor before installing finish flooring. Vapor barrier products prevent ground moisture from migrating upward through concrete. This protection becomes especially important for wood or laminate flooring vulnerable to moisture damage.
What’s Involved in Framing Basement Walls?
Framing creates the structure supporting drywall, insulation, and finished surfaces. Proper framing techniques ensure plumb walls, accurate dimensions, and secure attachment points for everything mounted later.
Installing Top and Bottom Plates
Framing basement walls follows a specific sequence that ensures straight, stable construction. Following these steps in order prevents common mistakes and creates professional results.
Follow this framing sequence:
- Mark layout lines on the basement floor showing exact wall locations
- Cut pressure treated bottom plate to length for each wall section
- Lay bottom plate along marked lines and mark stud locations every 16 inches
- Pre drill holes every 16-24 inches along the bottom plate for concrete fasteners
- Apply construction adhesive to the bottom of the plate
- Secure bottom plate to concrete floor using concrete screws and hammer drill
- Cut and install top plate, aligning it directly above the bottom plate
- Verify alignment using a plumb bob or laser level
- Fasten top plate to floor joists with 3-inch screws or nails
- Measure individual stud lengths accounting for floor irregularities
- Cut all studs to measured lengths
- Install studs by toe-nailing to top and bottom plates at marked locations
Use pressure treated lumber for bottom plates against concrete to resist moisture. Standard 2×4 lumber works for top plates in dry environments. The bottom plate must sit flat and straight since everything above builds from this foundation.
Quick tip: Apply construction adhesive along the bottom plate before fastening it to concrete for extra holding power and a moisture barrier between treated wood and concrete.
Fasten the top plate to floor joists using 3-inch drywall screws or framing nails. Ensure the top plate aligns vertically with the bottom plate below. Use a plumb bob or laser level to verify alignment before securing the top plate permanently.
Cutting and Installing Wall Studs
Measure the vertical distance between top and bottom plates at multiple points along each wall run. Basement floors and ceiling joists often vary slightly, requiring individual stud measurements. Cut studs to length, accounting for any irregularities discovered during measuring.
Space wall studs 16 inches on center for standard installations. This spacing provides adequate support for drywall and allows easy location of studs later when mounting cabinets or heavy items. Use 24-inch spacing only in non-load-bearing walls where codes permit.
Toe-nail studs to top and bottom plates using a nail gun with 16d nails, or secure them with 3-inch screws driven by a drill. Pre-drilling prevents wood splitting, especially near board ends. Many DIYers prefer a framing nailer for speed, though hand-nailing or screwing works fine for smaller projects.
Install horizontal blocking between studs at mid-height for extra rigidity. Blocking provides backing for grab bars in bathrooms or chair rails in other rooms. The additional bracing strengthens walls and reduces drywall cracks from minor impacts.
Framing Door Openings and Utility Access
Door openings require headers to carry load across the span. Even in non-load-bearing walls, headers prevent sagging and provide solid attachment points for door frames. Use doubled 2x4s or 2x6s depending on opening width and local codes.
Install king studs at door opening edges running from bottom plate to top plate. Place jack studs inside the king studs, running from the bottom plate to the header height. The header rests on jack studs and connects to king studs, creating a reinforced opening.
Plan door openings to allow easy access between spaces while maintaining adequate wall space for furniture placement. Standard interior doors measure 30 or 32 inches wide, requiring rough openings approximately 2 inches wider to accommodate the door frame and shims.
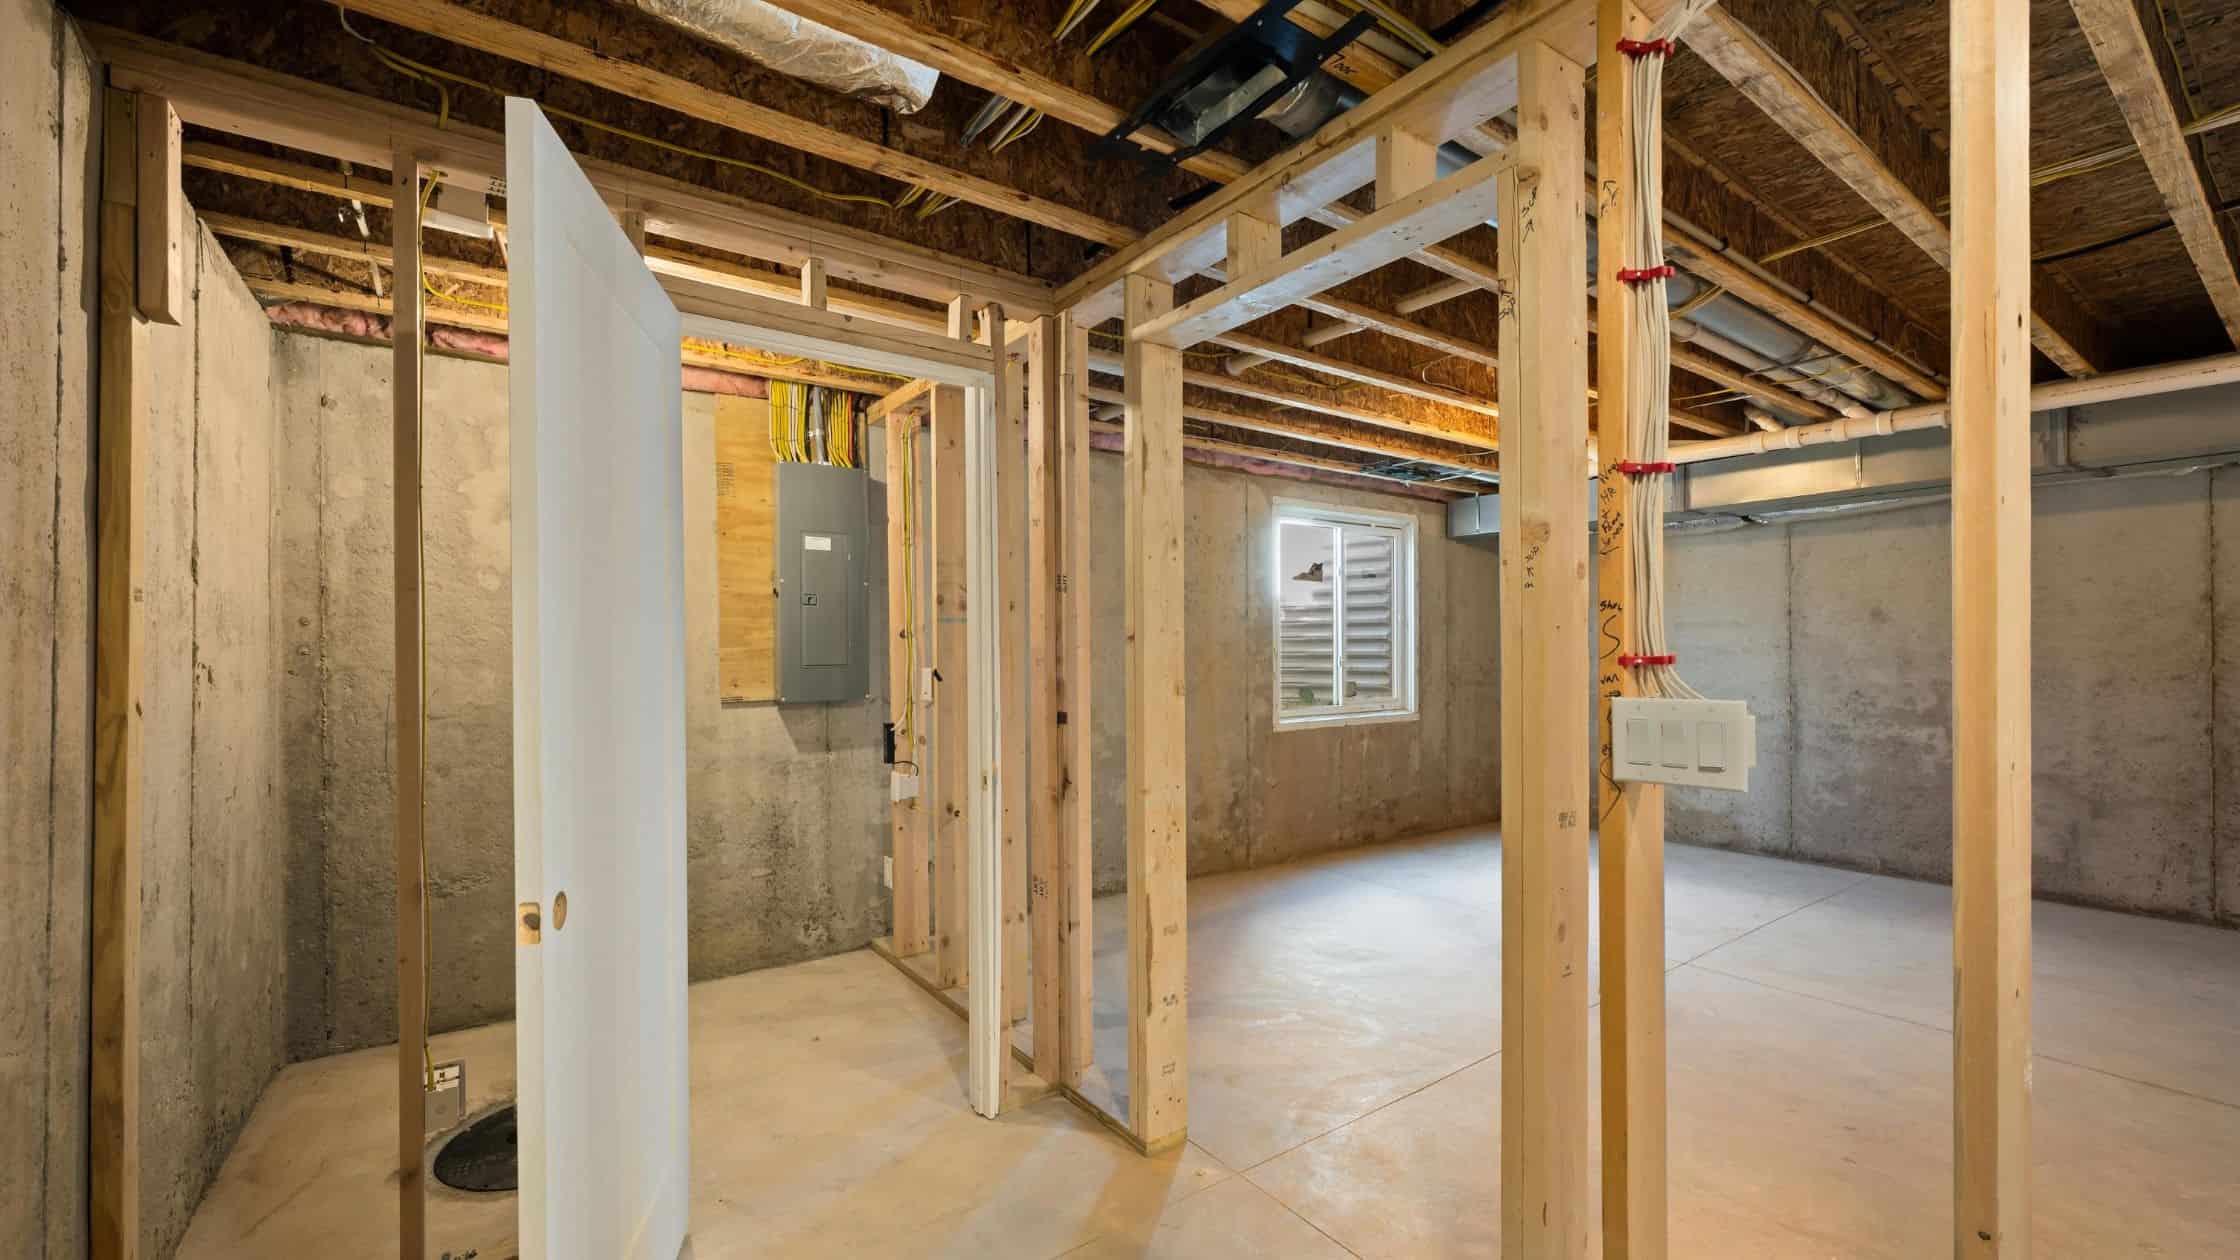
Leave utility room areas accessible for future service needs. HVAC equipment, water heaters, electrical panels, and sump pump systems require maintenance access. Avoid boxing these items behind drywall where reaching them becomes impossible without demolition.
How Do You Handle Electrical Work When You Finish a Basement?

Electrical installations determine lighting adequacy, outlet convenience, and overall functionality. Planning electrical circuits carefully and understanding safety requirements prevents code violations and creates comfortable spaces.
Planning Circuits and Running Wires
Calculate electrical loads before running wires to ensure circuits handle the intended usage. Bedroom circuits need sufficient outlets and lighting without overloading. Entertainment areas require dedicated circuits for televisions, gaming systems, and audio equipment.
Building codes specify minimum outlet requirements for habitable rooms. Place outlets so no point along a wall sits more than 6 feet from a receptacle. Kitchen areas and workshops need outlets every 4 feet of counter space. Plan outlet locations during framing before installing drywall.
Run electrical cable through floor joists and wall studs while framing remains exposed. Drill holes through stud centers 12 inches above the bottom plate to route cables horizontally. Keep holes at least 1.25 inches from board edges to prevent drywall screws from penetrating wires. Install protective nail plates where cables pass closer than 1.25 inches from wood edges.
Quick tip: Label every wire with the circuit number and destination at both ends using permanent marker or tape, saving enormous troubleshooting time during hookup and future repairs.
Installing Junction Box and Electrical Fixtures
Mount junction box units for outlets and switches at appropriate heights before closing walls. Outlet boxes typically sit 12-16 inches above finished floor height. Switch boxes mount 48 inches above the floor. Secure each junction box firmly to studs so boxes don’t shift during drywall installation.
Recessed lights require planning before drywall installation. Mark locations considering furniture placement and room function. Space recessed lights 4-6 feet apart for general illumination. Use IC-rated fixtures if insulation will contact the housing. Recessed lights installed in drop ceiling systems allow easier future access for lamp changes.
Electrical work beyond basic outlet and switch installation often requires licensed electricians. Most jurisdictions mandate licensed professionals for panel modifications, new circuit additions, and final connections at the main panel. The electrical permit process ensures inspections verify safe installation before walls close.
Ensuring Code Compliance and Safety
Electrical codes exist to prevent fires and electrocution hazards. GFCI (Ground Fault Circuit Interrupter) protection becomes mandatory in basements regardless of proximity to water sources. Modern codes require GFCI outlets or GFCI breakers for all basement circuits.
Arc-fault circuit interrupters (AFCI) protect bedroom circuits from electrical fires caused by damaged wiring. Maryland and most states adopt the National Electrical Code requiring AFCI protection in sleeping areas. Verify current local requirements during permit applications.
The building inspector examines electrical installations before allowing insulation and drywall installation. Keep wire runs neat and secure cables every 4.5 feet with staples. Maintain proper box fill calculations so junction box capacity isn’t exceeded. These details matter during inspections and affect long-term safety.
What Insulation Works Best for Basement Walls?

Insulation controls temperature, reduces energy costs, and creates comfortable living spaces. Basement insulation strategies differ from above-grade walls due to moisture concerns and building code requirements for foundation walls.
Choosing Between Foam Insulation and Fiberglass
Foam insulation provides superior moisture resistance compared to fiberglass batts. Rigid foam boards or spray foam create continuous insulation and air barriers against foundation walls. Closed-cell spray foam adds structural strength while insulating and waterproofing simultaneously.
Apply foam insulation directly to clean, dry concrete walls or foundation walls. Rigid foam sheets attach with construction adhesive or mechanical fasteners. Spray foam requires professional application but fills every gap and irregular surface perfectly. Two inches of closed-cell foam provides approximately R-12 insulation value.
Fiberglass batt insulation costs less than foam alternatives but demands careful installation against exterior walls. Never install fiberglass batts directly against concrete walls where condensation can develop. Instead, create an air gap using foam board against concrete, then frame walls with fiberglass batts between studs.
Did you know? Installing a vapor barrier on the warm side of insulation (between insulation and drywall) in basement applications can actually trap moisture and cause problems, making foam board or spray foam against concrete the safer choice.
Installing Insulation Properly
Cut rigid foam boards to fit between basement walls and framing. Seal all seams with tuck tape or specialized foam board tape. Gaps allow air infiltration that reduces insulation effectiveness and permits moisture movement. Proper sealing creates continuous thermal protection.
Spray foam application requires professional equipment and expertise. The foam expands to fill cavities and cure rapidly. Over-application wastes money while under-application leaves gaps reducing effectiveness. Licensed spray foam contractors understand proper application depths and safety protocols.
Fiberglass batts fit between wall studs when basement walls are framed away from concrete. Cut batts to length with a utility knife, fitting them snugly without compressing. Compression reduces R-value and diminishes insulation performance. Fill gaps around electrical boxes, pipes, and other penetrations with scrap insulation pieces.
Insulating Rim Joists and Headers
Floor joists sit atop foundation walls, creating rim joist areas vulnerable to air infiltration and heat loss. These spaces between floor joists where they meet outside walls require careful insulation attention. Spray foam works ideally for irregular rim joist cavities, creating air-tight seals.
Cut rigid foam to fit between floor joists snugly. Seal edges with expanding foam from a can. This combination blocks air movement while insulating effectively. Properly sealed rim joists dramatically improve basement comfort and reduce whole-house energy consumption.
Address ductwork insulation in unfinished ceiling areas. Wrap HVAC ducts with duct insulation to prevent condensation and improve efficiency. Secure insulation with tuck tape or duct mastic. Properly insulated ducts deliver conditioned air more efficiently to basement living spaces.
How Do You Install Drywall in a Basement?
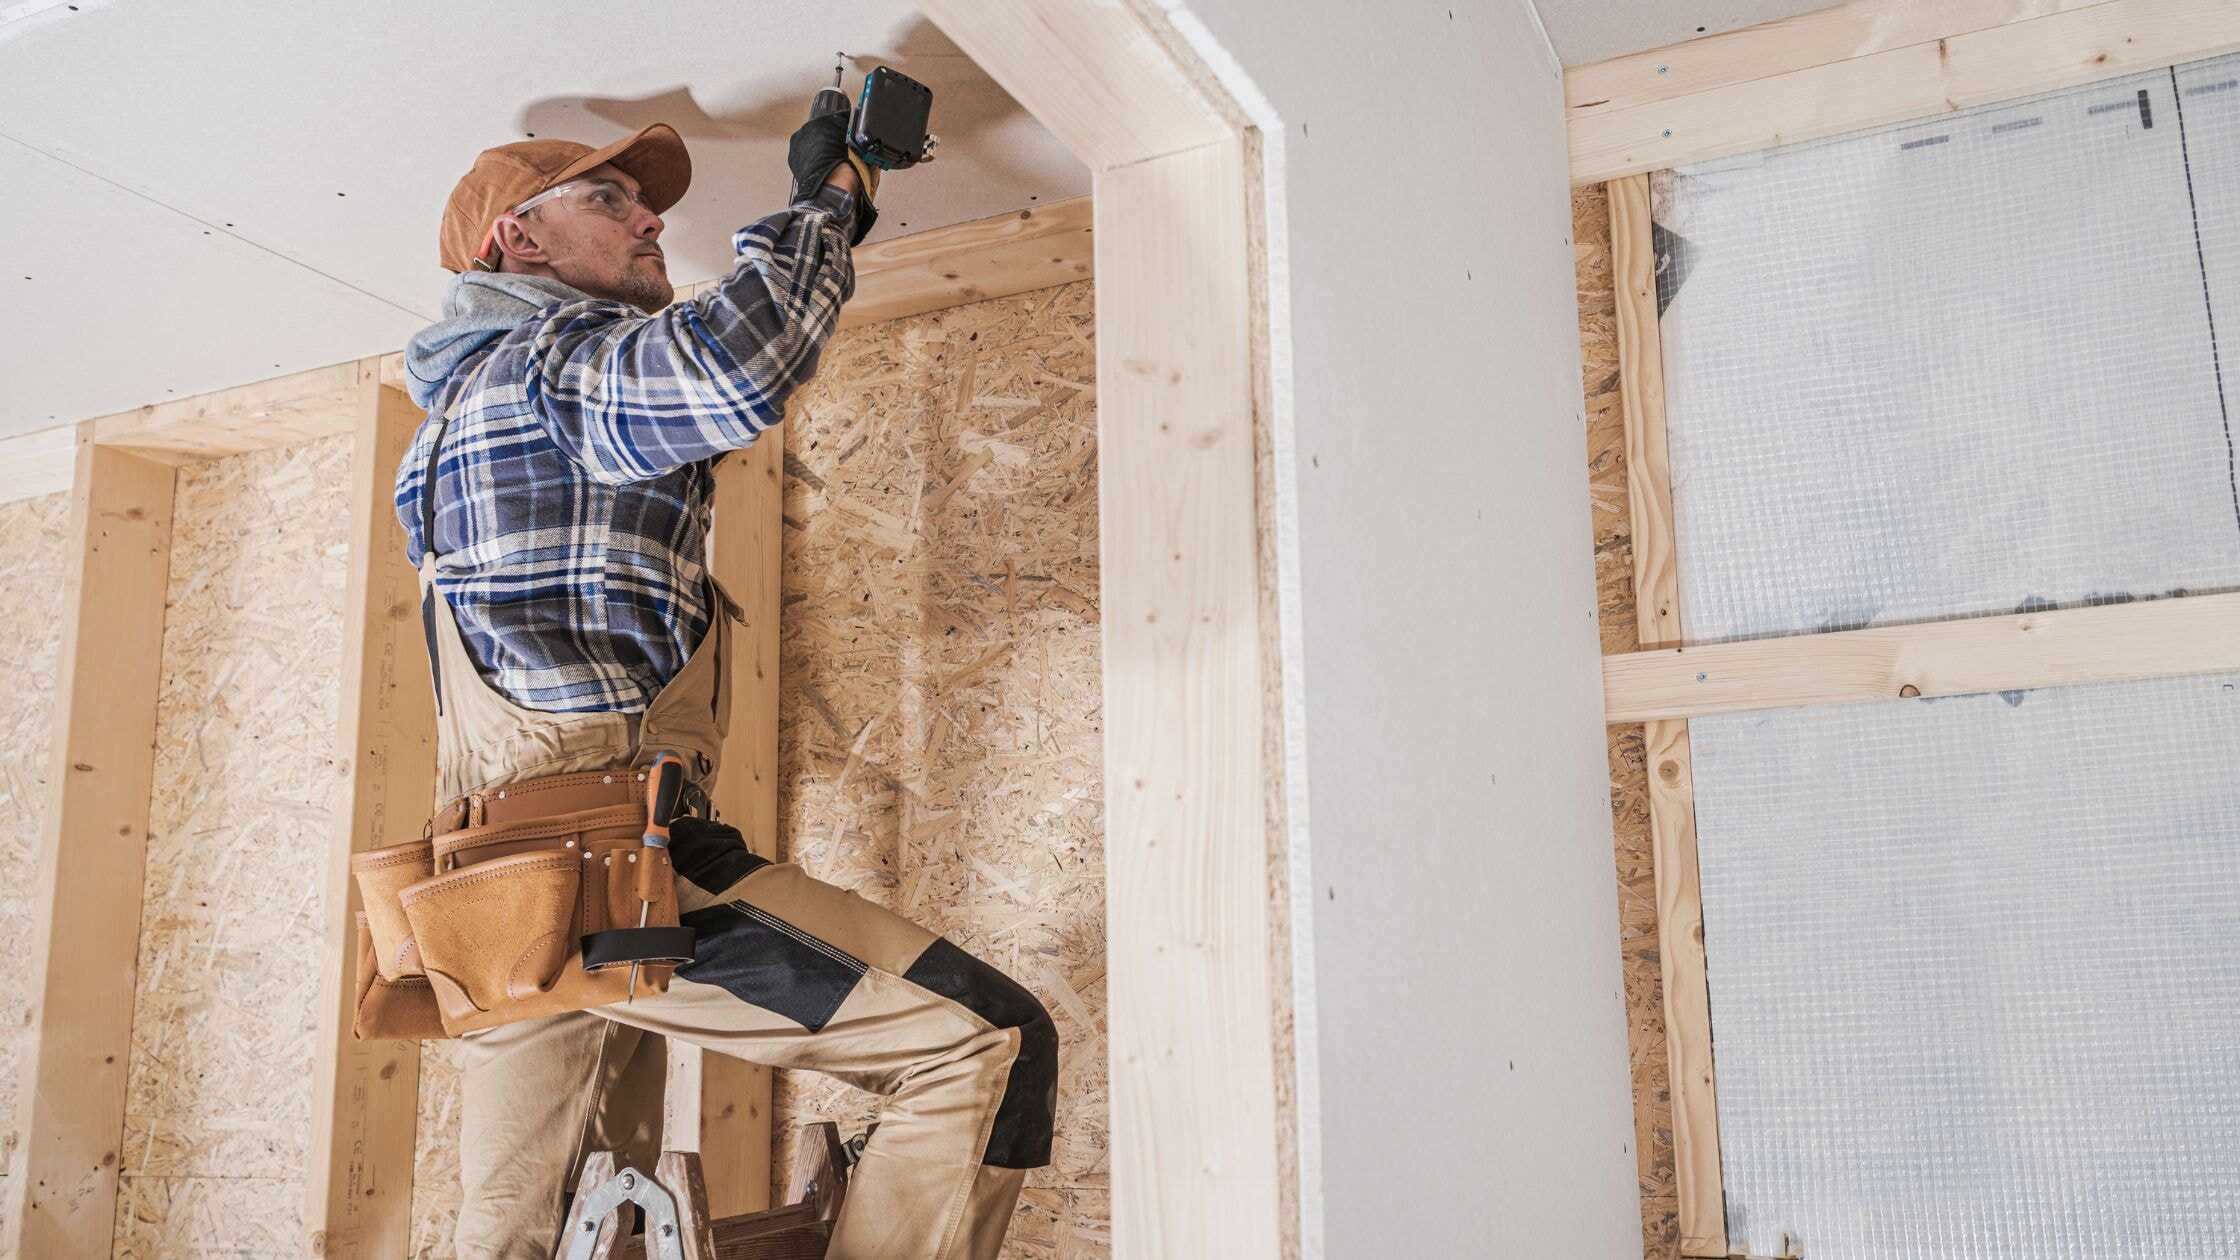
Hanging drywall transforms framed spaces into recognizable rooms. Proper drywall installation creates smooth surfaces ready for paint and trim while hiding framing and utilities behind finished walls.
Preparing to Hang Drywall
Verify all electrical and plumbing rough-in inspections pass before covering walls with drywall. Inspectors need to see wiring and pipes before they disappear behind drywall sheets. Schedule required inspections and obtain approvals before ordering materials.
Measure basement walls to calculate drywall sheet quantities needed. Standard sheets measure 4 feet by 8 feet, though longer sheets reduce seams. Plan drywall sheet placement to minimize seams and waste. Arrange delivery timing so materials arrive when needed without cluttering work areas for extended periods.
Gather essential tools before starting drywall installation. A utility knife with fresh blades cuts drywall sheets cleanly. A tape measure ensures accurate measurements. Drywall screws and a screw gun or drill make fastening quick and secure. A drywall T-square helps cut straight lines. Rent a drywall lift if working alone or to reduce physical strain on ceiling installations.
Hanging Drywall on Basement Walls
Start hanging drywall at room corners, working toward door openings. Position sheets horizontally when possible to reduce seams and increase strength. Lift drywall sheets tight against the ceiling before fastening. This technique eliminates gaps at the top while leaving a small gap at the floor for moisture protection.
Fasten drywall sheets to studs using drywall screws every 12 inches along sheet edges and 16 inches across field areas. Drive screws straight to prevent tearing the paper surface. Sink screw heads slightly below the drywall surface without breaking through the paper. Properly set screws dimple the surface gently, providing space for joint compound.
Cut door openings and electrical outlet holes accurately. Measure carefully from known references like corners or floor height. Use a drywall saw or utility knife to cut openings. Cut outlet holes slightly smaller than the junction box face so the outlet cover plate conceals all edges. Test fit pieces before applying joint compound.
Apply corner bead to all outside corners using metal or vinyl products. Fasten corner bead with screws or crimpers every 12 inches. The corner bead protects vulnerable edges while creating crisp lines. Inside corners need only tape and joint compound for reinforcement.
Finishing All the Drywall
Apply joint compound to seams using a taping knife. Embed paper tape in compound along all seams and inside corners. Smooth the tape, squeezing excess compound from beneath. This first coat bonds tape to the drywall surface. Allow proper drying time before subsequent coats.
Apply second and third coats of joint compound to all seams, fastener dimples, and corners. Each coat extends wider than the previous layer, feathering edges to create invisible transitions. Use progressively wider knives for each coat. A 6-inch knife works for first coats while 10 or 12-inch knives smooth final layers.
Sand dried joint compound smooth between coats and after final application. Use fine-grit sandpaper or sanding screens on a pole sander. Dust control measures become critical during sanding. Close doors to finished areas, use fans for ventilation, and wear respiratory protection. Wet sanding techniques reduce airborne dust significantly though they take longer.
Prime drywall before painting to seal surfaces and provide uniform paint absorption. Quality primer prevents joint compound from showing through finish paint. The primer coat reveals imperfections requiring additional joint compound and sanding before final painting.
What Ceiling Options Work for Basement Renovation?

Ceiling selection affects basement aesthetics, function, and budget. Different approaches suit various priorities from maximizing ceiling height to maintaining utility access.
Installing a Drop Ceiling
Drop ceiling systems provide easy access to pipes, wires, and ductwork while hiding the utilitarian appearance of floor joists. Suspended ceiling grids hold lightweight tiles that lift out for accessing utilities above. This flexibility appeals to homeowners wanting simple future maintenance access.
Measure ceiling height before selecting drop ceiling materials. Minimum habitable space height requirements constrain how far ceilings drop. Standard suspended ceiling systems lose 3-4 inches of height from the floor joists above. Low-profile systems minimize height loss but cost more.
Install perimeter wall angles level around the entire room using a laser level or water level. The wall angles support grid edges and establish level reference points. Hang main runners perpendicular to floor joists using suspension wires every 4 feet. Cross-tees connect between main runners, creating the grid pattern that holds tiles.
Quick tip: Plan drop ceiling height to clear ductwork and pipes while maximizing headroom, but always maintain code-required minimum ceiling height measurements throughout.
Creating a Drywall Ceiling
Drywall ceilings provide a traditional finished appearance that integrates seamlessly with upper floor aesthetics. Smooth drywall ceilings require more effort than drop ceiling installation but create cleaner visual lines. This approach suits spaces where utility access isn’t paramount.
Frame ceiling joists perpendicular to existing floor joists when additional support becomes necessary. Attach ceiling joists to foundation walls and support posts. The framing provides continuous nailing surfaces for drywall sheets while running perpendicular to floor joists above strengthens the assembly.
Hang ceiling drywall using a lift or helpers to support sheets during fastening. Ceiling installation proves more physically demanding than walls due to working overhead. Fasten drywall sheets to ceiling joists every 12 inches using drywall screws. Ensure solid attachment across the entire sheet to prevent sagging.
Finish ceiling drywall identically to walls. Tape seams, apply joint compound coats, sand smooth, prime, and paint. Textured ceiling finishes hide minor imperfections and reduce labor compared to smooth finishes. Many basement renovations use simple ceiling textures applied with rollers or sprayers.
Embracing the Industrial Look
Exposed ceiling designs leave floor joists, ductwork, pipes, and wiring visible while painting everything a uniform color. This industrial look maximizes ceiling height in low basements while reducing cost and labor. The style works especially well in entertainment spaces and utility room areas.
Clean exposed elements thoroughly before painting. Remove cobwebs, dust, and debris from all surfaces. Repair any damaged components. The cleaning process determines whether exposed ceilings appear intentionally industrial or merely unfinished.
Paint everything above black, white, or dark gray to create cohesive appearance. Dark colors make ceiling elements recede visually, creating the illusion of greater height. Use airless sprayers for efficient coverage of irregular surfaces. Multiple thin coats cover better than single thick applications.
Install recessed lights or track lighting before painting to avoid disturbing finished surfaces. Run wiring neatly along floor joists or through conduit for clean appearances. Expose ceilings demand attention to utility organization that drop ceiling and drywall systems conceal.
What About Flooring for Your Finished Basement?
Flooring selection completes basement spaces while affecting comfort, durability, and moisture resistance. Different materials suit various uses and moisture conditions.
Moisture-Resistant Flooring Options
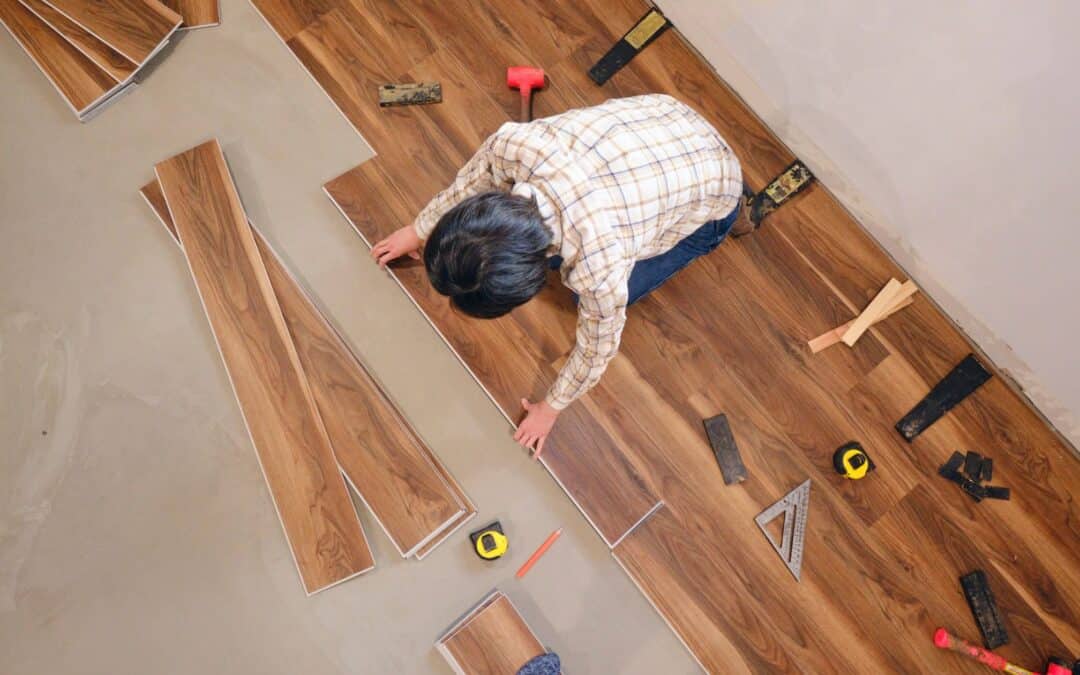
Luxury vinyl plank (LVP) flooring provides excellent moisture resistance with wood-like appearance. The floating floor installation allows easy repairs and handles minor moisture without damage. LVP installation requires only a vapor barrier over concrete floor surfaces and simple click-lock assembly.
Ceramic or porcelain tile delivers permanent water resistance ideal for utility room spaces or areas with potential moisture exposure. Tile requires solid, level concrete floor surfaces for proper installation. The material feels cold underfoot but allows radiant heat installation for comfort.
Engineered hardwood tolerates more moisture than solid wood though still requires dry conditions. Install vapor barrier under engineered wood flooring to prevent ground moisture transmission. The authentic wood appearance appeals to homeowners wanting traditional aesthetics in finished basement spaces.
Avoid standard carpet in basements prone to moisture problems. Carpet absorbs water and supports mold growth when dampness occurs. If using carpet, select moisture-resistant padding and install only in consistently dry spaces.
Installing Basement Flooring
Verify the basement floor remains dry and level before flooring installation. Moisture meters detect excess water vapor in concrete that damages flooring. Level significant irregularities with self-leveling compound. Most floating floor materials tolerate minor variations but excessive slopes or depressions create problems.
Install vapor barrier according to manufacturer specifications. Some floating floors include integrated moisture barriers while others require separate underlayment. Overlap seams and tape joints to create continuous moisture protection. The vapor barrier prevents ground moisture from reaching floor materials.
Follow specific installation instructions for chosen flooring materials. Floating floors require expansion gaps around perimeters to accommodate seasonal movement. Tile needs thinset mortar application and grout after tiles set. Luxury vinyl plank systems click together quickly with minimal tools required.
Frequently Asked Questions About DIY Basement Finishing
How Long Does It Take to Finish a Basement?
DIY basement finishing typically requires 3-6 months working part-time on evenings and weekends. Timeline depends on basement size, complexity, available time, and experience level. Simple utility room upgrades finish faster than complete transformations with multiple bedrooms, bathrooms, and entertainment spaces. Permit processing and inspection scheduling add weeks to overall timelines.
What’s the Hardest Part of Finishing a Basement?
Most DIYers find electrical work, plumbing, and drywall finishing the most challenging basement renovation tasks. Electrical and plumbing work often requires hiring licensed professionals for safety and code compliance. Hanging drywall proves physically demanding while finishing drywall smooth requires patience and practice. Planning and preparation actually prevent most difficulties homeowners encounter during basement finishing projects.
Do You Need a Building Permit to Finish a Basement?
Yes, most jurisdictions require building permits for basement finishing projects. Permits ensure work meets safety codes, structural requirements, and electrical/plumbing standards. Egress windows, bedrooms, bathrooms, and structural modifications definitely require permits. Contact local building departments before starting work to understand specific requirements. Working without permits creates legal problems and complicates future home sales.
Can You Finish a Basement with Moisture Problems?
Never finish a basement with active moisture problems. Exterior wall water intrusion destroys finish materials, creates mold growth, and wastes renovation investments. Address water issues before starting finish work. Install proper drainage systems, repair foundation walls, waterproof exterior walls, and verify the basement remains dry through multiple rain cycles before proceeding with finishing materials.
How Much Does DIY Basement Finishing Cost?
Material costs for DIY basement finishing typically range between $15-35 per square foot depending on material choices, ceiling type, and fixture quality. A 1,000 square foot basement costs $15,000-35,000 in materials when homeowners provide labor. Hiring contractors for electrical, plumbing, or other specialized tasks increases costs substantially. Compare these figures against full contractor pricing of $50-100+ per square foot including labor.
Should You Insulate Basement Walls?
Yes, insulating basement walls improves comfort, reduces energy costs, and prevents condensation issues. Use foam insulation against foundation walls for best moisture resistance. Building codes in Maryland and most regions now require insulation in finished basements. Proper insulation prevents cold walls that create condensation problems and uncomfortable temperatures during extreme weather.
What Mistakes Do DIYers Make When Finishing Basements?
Common mistakes include ignoring moisture problems, inadequate planning, skipping permits, incorrect framing techniques, and poor insulation installation. Many DIYers underestimate project timelines and budgets, creating stress and incomplete projects. Hiring professionals for complex electrical, plumbing, and structural work prevents expensive code violations and dangerous installations. Following comprehensive basement finishing guides helps avoid these common pitfalls.
Making Your Basement Finishing Dreams Reality

DIY basement finishing projects reward homeowners with valuable living space, practical skills, and significant cost savings. Success requires honest assessment of personal abilities and knowing when to hire professionals. Electrical work, plumbing, and structural modifications typically need licensed contractors to ensure safe, code-compliant installations. Address moisture problems before starting any finish work through proper basement waterproofing and drainage systems.
Breaking the major project into manageable phases allows steady progress while maintaining flexibility around schedules and budgets. Comprehensive basement finishing guidance helps DIYers avoid common pitfalls and plan projects correctly. Complete one phase entirely before starting the next to maintain momentum and prevent backtracking.
Home Style Improvement offers consultation services for DIYers planning projects independently and full-service options for homeowners wanting expert results without managing every detail themselves. Whether tackling the entire room independently or hiring professionals for complex aspects, the finished basement delivers lasting value and enjoyment.